Facebook pixel How-To's

How-To's

Learn how to protect your data and devices.

Protecting Microsoft Office and Adobe PDF files with a password encrypts the file contents. This prevents the wrong people from gaining access to the file. Only people with the password can retrieve its data.

In Microsoft Word or Excel:

  1. Select "File" from the top menu.
  2. MS Office File
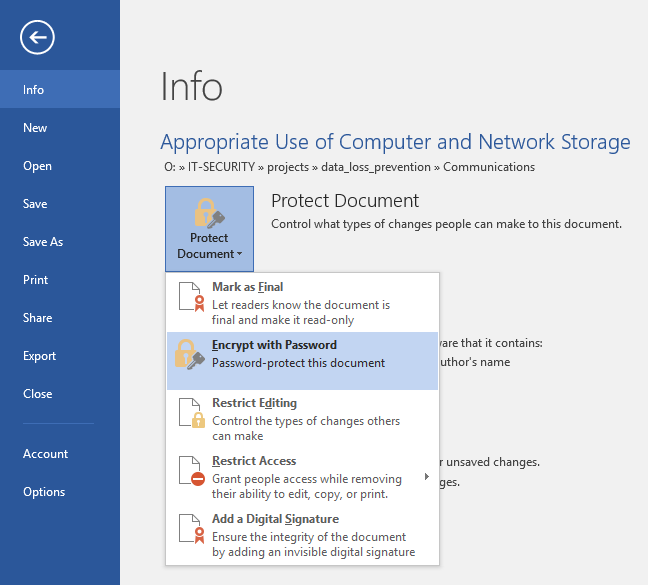
  3. Select Protect Document and choose "Encrypt with Password".
  4. Protect Document
  5. Enter the password you want to use to protect the document.

Use a password that you can share with whoever might need access to the file. Do not use your MySTLCC ID password.

Protecting Microsoft Office and Adobe PDF files with a password encrypts the file contents. This prevents the wrong people from gaining access to the file. Only people with the password can retrieve its data. Protecting Adobe PDFs requires Acrobat Standard or Pro (Reader will not work). Contact the Help Desk if you need Adobe Acrobat Standard or Pro.

In Adobe Acrobat

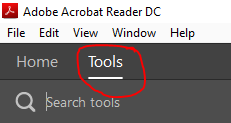
  1. Select Tools.
  2. Adobe Acrobat Tools
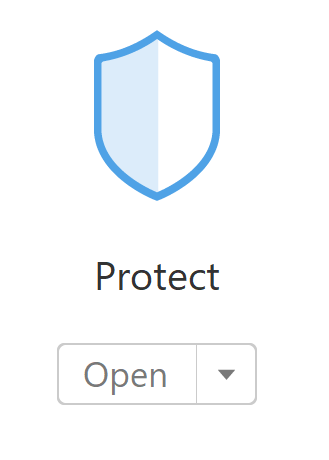
  3. Select Protect.
  4. Adobe Protect
  5. Select Encrypt, and then "Encrypt with Password"
  6. Adobe Encrypt
  7. Check the box that says "Require a password to open the document.
  8. Enter a password and select OK.
  9. Adobe Password
  10. Confirm the password.
  11. You are finished.

Use a password that you can share with whoever might need access to the file. Do not use your MySTLCC ID password.

Having VPN access with your College laptop enables you to access College services as you would from on-site. Resources like your P:\ and O:\ drives will connect automatically when you log in, just like at your desk. The VPN client will be automatically installed. After the application is installed you will be prompted with one of the screens below. Follow these steps:

Windows 10

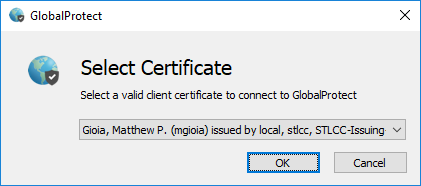
  1. You may be prompted to select a certificate. Select the certificate associated with your MySTLCC ID. If you are not prompted, your certificate was automatically selected and you will see step 3 first.
  2. VPN Certificate Requirement
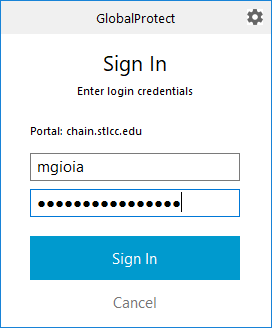
  3. You will be prompted by a "Sign In" window. Enter your MySTLCC ID and password.
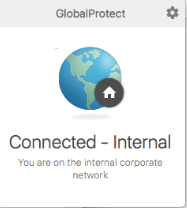
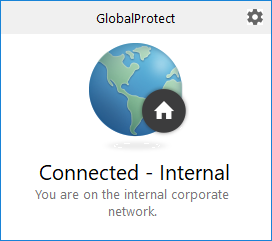
  4. Sign InVPN - Connected - Internal
  5. Reboot your laptop or tablet.
  6. To ensure the P: and O: drives connect successfully when you log in, you will need to ensure that your Wi-Fi connection is active and the VPN is connected prior to logging in.
  7. Before logging in, make sure that your wireless connection is active and connected (in the low right-hand corner of the screen).
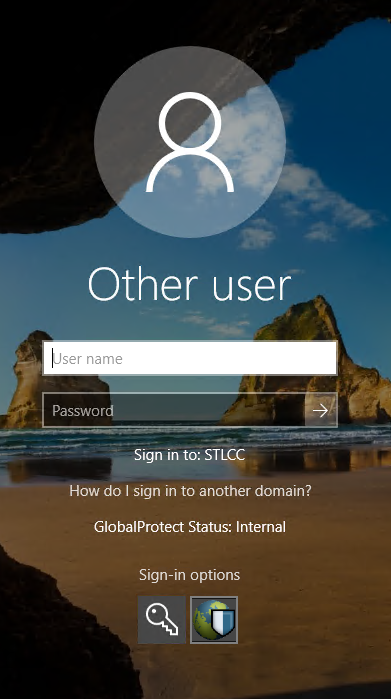
  8. Choose Sign-in options , and ensure that the World+Shield icon is selected before entering your MySTLCC ID and password.
  9. Login Screen Sign In Options
  10. Sign in with your My STLCC ID.
  11. Once signed in, all your drives will map up and you will have access to internal College resources like Banner, Mitel Connect, and Banner Reporting.
  12. This concludes the Windows 10 VPN setup instructions. You are now connected to STLCC wherever you go with your College laptop.

NOTE: At this time you will need to have a technician present during the installation on Mac OSX. Contact the Help Desk to request a technician to help during the installation procedure.

Having VPN access with your College laptop enables you to access College services as you would from on-site. Resources like your P:\ and O:\ drives will connect automatically when you log in, just like at your desk.

You can install the VPN client through the Self Service application installation.

On your College MacBook click "Go" and select "Applications".
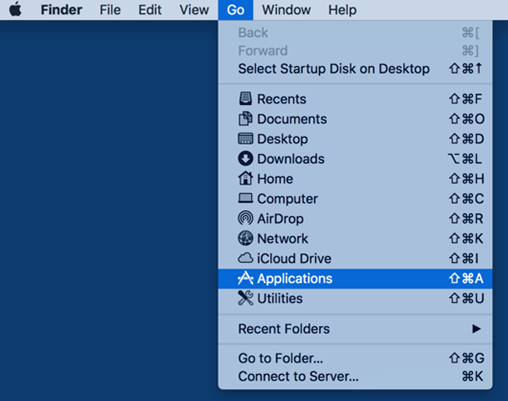
Mac OS X Finder - Go - Applications

Scroll down and select "Self Service".
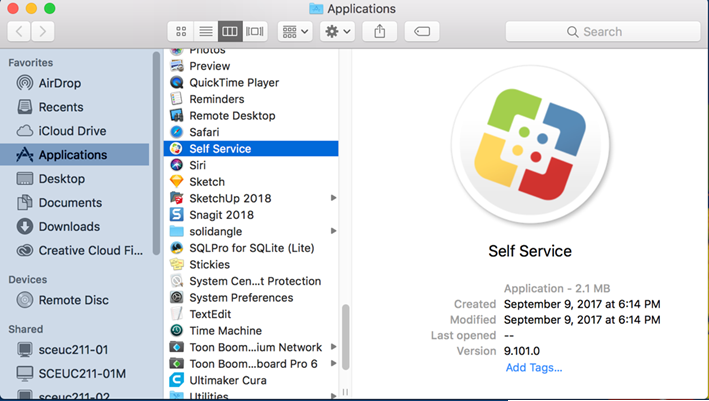
Mac OS X Self Service Apps

Select "Featured" and click "Install" on the Global Protect application.
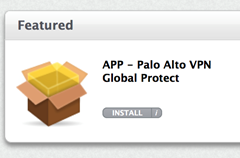
Palo Alto Networks GlobalProtect

Once install is complete, a Welcome Screen in the system tray will appear. Enter the portal name here - “chain.stlcc.edu”:
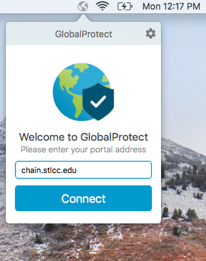
Enter Portal Address

When prompted for a certificate, utilize one of the certificates associated with your user MySTLCC ID.
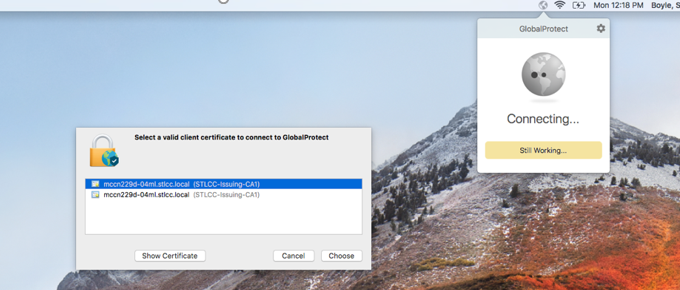
Certificate Prompt

At this point, an administrator will need to enter the admin credentials twice. The GlobalProtect Agent needs access to the keychain to submit the certificate for authentication.
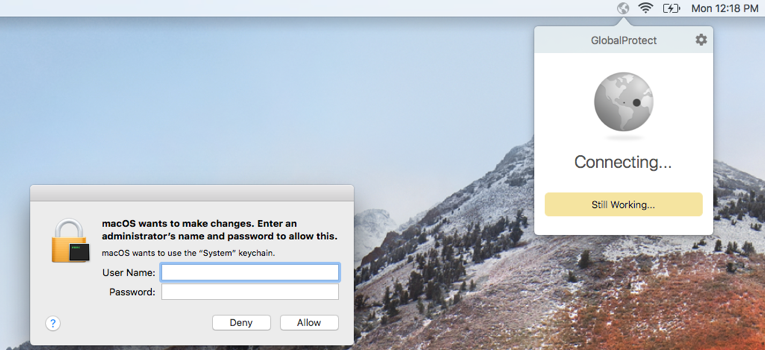
GP Keychain Access

The software will then prompt for login information. Enter you MySTLCC ID and password.
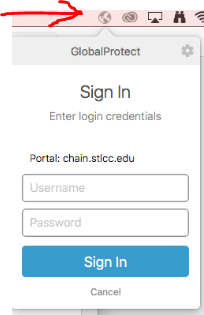
GlobalProtect Login

GlobalProtect Connected

VPN connection is successful upon receiving the Welcome Page.

Back to top